|
James Ryder, my great grandfather was a blacksmith and a carriage maker. He owned his own shop and employed several men to help him with his work. One of these men would have been a carriage painter. Until James became established he would have painted carriages himself and would have apprenticed any young man that he employed. The shop would need to have been a good size as several rooms were needed in order to paint and finish a carriage, buggy, wagon or sleigh. James eldest daughter Martha married a carriage painter. I do not know if he was ever under the employ of James but it would have been quite possible. The larger well-equipped shop would most likely have had a wheeled trolley to move the coach body from place to place within the shop while it was being painted, decorated and finished. As well as the areas used to build the carriage, a very special room, uncluttered and dust free was needed, to apply the final coats of varnish to the vehicle. Careful consideration would have been given to the ventilation of this room so the varnish could get the good supply of oxygen needed to dry properly. This would prevent pitting or crawling of the varnish. The room also needed a constant source of heat to keep the temperature even during the drying process. A carriage painter’s shop would have not only the tools to build the carriage but also a large supply of tools and products to decorate it and create a final product that would boast the creator's ability. 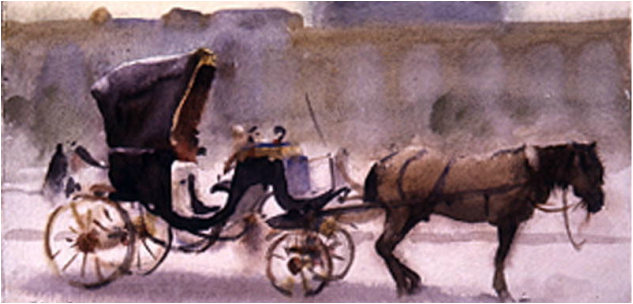 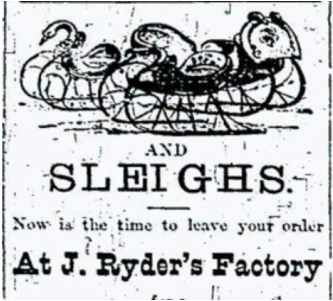 Part of an ad in the Acton newspaper November 1876 The original old method of priming was the lead colour method. This was used to prevent the raising of the grain of the wood. Each layer of the primer was rubbed and all bruises were repaired with putty. Pumice would be used along with a pail of clean water, a sponge, a chamois skin and a water tool. This process was used between each coat. It was important to make sure the pumice was of fine quality to get the desired effect on the finish. The water tool (sash tool) was used when the “rubbing out” was completed. At that point the carriage was dried off with a chamois skin. Three coats of paint were applied to the carriage before it was varnished (finishing coat). Varnishing was a very critical part of the process and as mentioned before a special room was needed. It is important to note that each tool had its purpose and was to be used for that purpose only, as mixing the uses of your tools could result in a poor quality finished product. Tools of the TradePigments and varnishes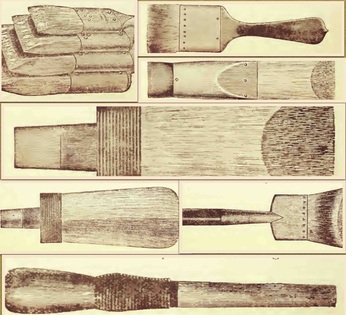 The following are illustrations of the painter's brushes starting at the top right clockwise. 1. Camel’s Hair Brush: The hairs of this brush fastened not only by cement but by riveting as well. Anything unriveted was not considered to be suitable. 2. Cleaning Up Brush: A flattened rounded tool used to clean up around the moldings, between the spokes etc. Bristles would have been set in glue insoluble in varnish not fastened with cement. 3. Round brush: This brush, used to prime the bodies had to be “bridled” as the bristles were always too long. Strong cord was wrapped around the bristles up to about the middle. Once the brush wore down the bridle could be removed giving the brush a new life. 4. Badger Hair Flowing Brush: even in the late 1800’s this brush was almost obsolete but the imitations were considered worthless so it was a very valuable tool to have.. 5. Sash tool was the companion to the round brush and was used to clean the moldings and painting small panels. 6. Oval Brush: Used for varnishing the large body panels and made of French white bristles entirely. Properly cared for it had a long life and it improved with age due to the wear which caused chiselling giving it the desired shape and softness. 7. Flat bristled Brushes: a good stock would have been kept in the shop. Priming and Preparing the Coach for the FinishBrushes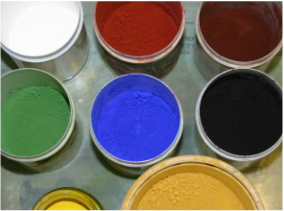 The shop would also need a good supply of pigment, turpentine, brown japan (a stain), and lindseed oil (raw not boiled) as well as several varnishes for rubbing and varnishing. This would indicate how volatile the carriage makers shop would have been. When James lost his shop to fire the flames must have been quite intense. The pigment tints always on hand at the shop would have been numerous. As follows: White lead in oil, Ultramarine blue, Dutch pink, Dry white lead, Munich lake, /Chrome yellow, Lemon chrome, Yellow ochre, Raw sienna, Milori green, L” M. and D., Chrome green Yellow lake, Whiting, Lamp black, /Burnt sienna, Raw umber, Burnt umber, Indian red, Venetian red, Prussian blue, Ivory black, Carmine No. 40, Vermillion English L. and D. American vermillion. There were recipes to create just the right shades needed. Premixed paint was unheard of back in the mid- to late 1800’s as they were far too expensive. The glazing or transparent coating was used over a similar coloured ground. An example would be verdigris over green or carmine over reds. This would account for the various varnishes. Putty in different colours and consistencies was also needed in the process as well. Carriage Adornment Striping 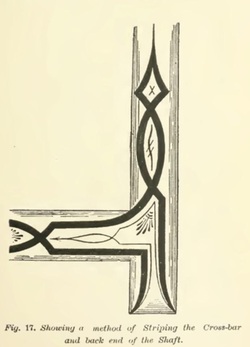 An expert carriage painter also needed a signature and a good hand along with special pencils and tools to create design on the carriage and make it his own. A steady hand was also a must. One way to adorn a carriage was to apply stripes. This was all done by hand, hence the need for a steady hand. Some of the designs could be quite intricate and sometimes gilt was applied, as an added expense and usually for a very special project. Lettering 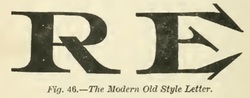 Wagons could also be lettered as well. A variety of lettering was used. This was a tedious and painstaking job and took much planning on the part of the carriage painter. Among these tradesmen certain ways of lettering had to be followed and certain lettering was acceptable while others were not. Wagon Scrolling 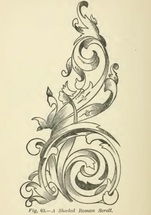 Wagon scrolling was a feat accomplished by few. All of this was done freehand so the painter not only had to have a good hand but also a good eye. I wonder if James ever scrolled his carriages or sleighs. This also would have added expense to the carriage as extra time was involved. Stenciling 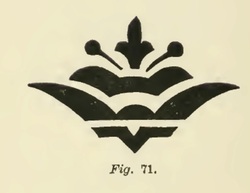 Another method of decoration would have been stencilling. Patterns were used in this instance to create a decoration on the wagon. This was a much less expensive way to decorate a carriage. This week features the family of James Ryder and Mary Priscilla Swackhammer. Click on the link for each child to read a little about their life. Martha Mathilda Priscilla Ryder-Long, James William "Billie" Ryder, Emma Jane "Jennie" Ryder-Pollard, Mary Augusta Ryder-Morrison and Jacob Henry Ryder Bibliography :The Complete Carriage and Wagon Painter by Fritz Schriber M.T. Richardson Publishers, New York 1895
The Acton Free Press November 2, 1876
1 Comment
Dianne
1/10/2015 07:29:44 am
Hi, Enjoyed your recent posts. Nice use of historical context. I love the photos. Your comment will be posted after it is approved.
Leave a Reply. |
Stephanie Bell-Boissonneault"When researching Family never leave a stone unturned, not even a pebble." Archives
July 2023
Categories |
- Home
-
MATERNAL: MCKEOWN
- MCEWAN History
-
William McKewn (1753 - aft 1790) 4th gg
>
- McKeown John (1786-1851) 3rd gg >
- William McEwan (1811 - 1887) 2ndgg >
-
John McEwan (1841 - 1917) gg
>
-
Janet Stevenson-McEwan (1844 - 1925)
>
- Frederick W. McEwan (1865 - 1866)
- Robert Stevenson McEwan (1866 - 1931)
- William Brown McEwan (1868 - 1961)
- John (Jack) McEwan (1869 -1949)
- Edith McEwan (1872 - 1957)
- Henry (Chum) McEwan (1874 - 1905)
- Marian (Mae) McEwan (1876 - 1958)
- Janet (Toots) McEwan (1877 - 1963)
- Benjamin McEwan (1879 - 1953) Brief
- Emma (Em) McEwan (1881 - 1957)
- Helen (Nell) McEwan (1884 - 1967)
- Edward McEwan (1886 - 1887)
- Alma McEwan (1888 - 1888)
-
Janet Stevenson-McEwan (1844 - 1925)
>
-
Benjamin McEwan (1879 - 1953)
>
- Stevenson >
- Munro >
-
Ostrom
>
- Early Knight Family
- Knight >
-
PATERNAL: BELL
- Bell Theories
- Bell History
- William Bell (1777 - 1839) >
- Hugh Bell (1810 - 1866) >
- William Bell (1839 - 1919) >
- Robert John Bell (1873 - 1941) >
- Kelvin Rankin Bell (1907 - 1978) >
- Kelvin Darcy John Bell (1928 - 1981)
- McDowell James and Glover Mary >
-
Early Ryders of Lambourn
>
- Martin - Swackhammer Ancestry and Immediate Descendants >
- Blog
 RSS Feed
Photos from Der Vollstrecker, Joybot, Mark Strozier, mikecogh, Gigi Ibrahim, xddorox, Marasmusine, Toronto Public Library Special Collections, tkksummers, Xoan Baltar, Mr.TinDC, pstenzel71, hedera.baltica, Dick Thompson Sandian, alh1, pstenzel71, Ruth and Dave, pstenzel71, L'Teigneux, hedera.baltica, T.Kiya, Sharon Mollerus, pstenzel71, ystjacques, pstenzel71
